Wednesday 2 October 2019

THE WAR ILLUSTRATED No.12 - SECOND BATTLE OF SHOBDON

14. MR HODGES' AUDACIOUS GAMBIT


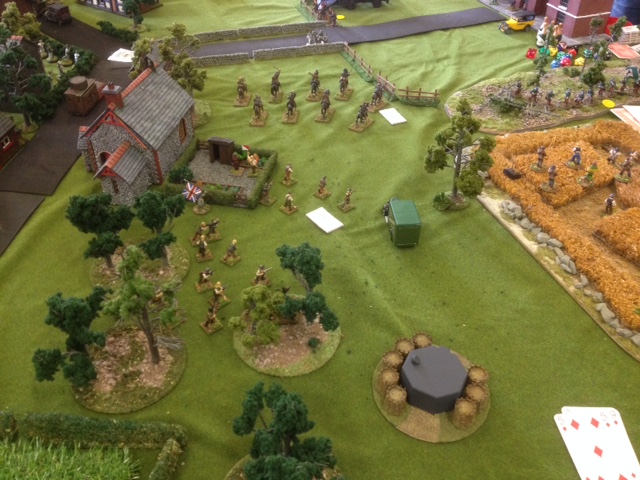
A view of the "centre table" - from Mr Hodges' Pillbox. Shobdon Village is off to the left, where the AA Column is
battling on (and mostly burning). The Government being distracted (and mostly distraught), now is the time for
Mr Hodges' Gambit! He sends his infantry forward, his cavalry into a charge, and launches his Armoured Cars
towards Shobdon Junction, with its all important Bateman Coat of Arms.
Charge! For the true 4th Baron Bateman!
Mr Hodges' "Lash Up Mk1" Armoured Car swerves through Shobdon Junction at speed, only to fall
victim to a BUF A/T Rifle. Heavy shellfire descends on the advancing cavalry....
..as the BUF "Big Gun" in the park of Shobdon Court deals out death. Mr Hodges' cavalry are effectively
obliterated. Lt. Lucy's forces are ordered forward to stabilise the Government's position...
..and set up a firing line along the driveway to Shobdon Court. Just as Mr Hodges' forces look finished, Anglican
reinforcements begin to arrive from the East Table (the Bishop of Lichfield's brown trucks and prime movers
are visible in this shot). Mr Hodges must re-gather his forces for another attempt...
Bugger This! A lone LDV cyclist can't wait for another assault. He pedals furiously forward to the Bateman Coat of
Arms, dodging shot and shell. A swerving turn as he gathers the standard from the Junction roadway, and then a
furious pedal back, weaving from side to side as he evades everything thrown at him. A true Shobdon hero!
[and the Umpires shuffle awkwardly. They had meant the Coat of Arms to be a fixed point to be battled
over, but had forgotten to write in a scenario rule that it could not be moved. Much blather about
apologies, lessons learned, learning points, etc. etc. - but the Bateman Coat of Arms is now with
Mr Hodges - can he hang on to it until the end of the battle?]

No comments:

Post a Comment