Friday 11 October 2019

AUTUMN BIG GAME 2019 - GOVERNMENT ANNOUNCEMENTS!

The Hereford County Gazette carries the following story.....................

BIG RESHUFFLE FOR HEREFORD GOVERNMENT FORCES

County HQ confirmed there have been a number of changes to Government Forces in the area of Mortimer's Cross. A spokesman told our reporter: "Following a lengthy campaigning season, and with the interests of our gallant troops in mind, a number of unit adjustments have been made locally, but local residents may rest assured that this in no way diminishes our capacity to defend the county against the depredations of the Red Menace and their gullible Anglican dupes."

It is understood that the Wulfhere battalion of the BUF have been withdrawn for rest and resupply (while it’s officers no doubt trawl the slums of Birmingham for more recruits ! ). In their place, the Hereford Auxiliary Reserve Division have been called up. This unit has a tough reputation, containing as it does a number of veterans of the Black and Tans who served in the ‘Troubles’ in Ireland.

The Ladies of Cheltenham College have returned to school for their impending exams, so the Lucton School Cadet Force has been mobilised in their place. A flu epidemic has badly affected the Royal Cameroon Highlanders, unused as they are to our climate, but in their place has arrived the Spanish Blue Division of Falangist volunteers, loaned by General Franco, who is obviously confident his own civil war is heading towards a satisfactory conclusion.

All this means that Viscount Scudamore’s Loyal Legion have assumed the role of senior unit of the local government forces. With rumours of a Communist advance in the north of the county the revamped government troops will need to look to their laurels in the weeks ahead.....

(with thanks to Senior Captain Maynard (Alan) for the text and following unit photographs)

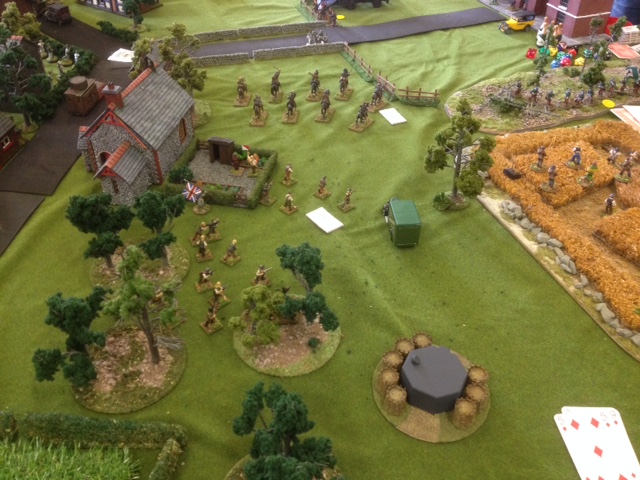
Hereford Auxiliary Reserve Division skirmish forward towards Mortimer's Cross
The Lucton School Cadet Force come into the line in place
of the hockey stick waving (but temporarily exam bound)
schoolgirls of Cheltenham Ladies College
General Franco's Falangist Volunteers take their "Blue Division"
unit designation literally. Arriba!
Notes:

(1). The Editor of the "Hereford County Gazette" has now received a "stiff note" from Ludlow Castle, pointing out that Anglican Forces have "no interest" in Mortimer's Cross and "will not be attending the party". The Rev Duff-Postin, High Chancellor of All-Ludlow, added that, if HMG were ever desirous of forming an alliance with the Anglican League (as to which, "the clock is ticking"), describing them as "gullible dupes" was hardly going to assist. The Reverend added that HMG had still to agree to hand over the captured Bishop of Hereford, an essential pre-condition to "any substantive talks" and that "there remains a gulf between the parties that only compromise on the part of the Government can resolve". Were the Bishop to be returned, it was always possible that Ludlow would "grant an extension" to the time limited for talks...

(2). Other newspapers are reporting the arrival of a "Commissar-heavy" task force at Mortimer's Cross, accompanying Comrade Deepinthevoltski, "Senior Wealth Redistribution Adviser" to Comrade Professor Winters, together with a team of SMG toting "Revolutionary Auditors".

Thursday 3 October 2019

AUTUMN BIG GAME 2019 - MORTIMERS CROSS REDUX aka OPERATION SCYLLA


The Hereford VBCW Autumn BIG GAME 2019 will take place at the Burley Gate Village Hall, Herefordshire, on Saturday 12th October 2019 from 10am - 5pm (set up from about 9.15 am). All our usual arrangements apply (see the "Practicalities" paragraphs to this preceding blogpost) save that, as already notified to intending participants, our game charge has increased to £20 for the day in order to account for the recent significant increase in the Hall booking fees.........anyway.......

Those VBCW battlefield tourists looking for a memorial cross at Mortimer's Cross will be sadly disappointed. The only memorial to a battle on this hallowed ground is a simple stone pedestal:

The Mortimer's Cross Memorial

recording not a VBCW event, but a much earlier "Wars of the Roses" battle on 2nd February 1461. An account of the 1461 Battle can be found HERE.

Some 475 years later, the land around Mortimer's Cross still remained largely agricultural in nature, populated by historically tight-fisted farmers, but now criss-crossed with roads (of varying quality) carrying the commercial traffic of the County:

Mortimers Cross in 1937/1938
It is to this area that Senior Captain Maynard retreated after the Second Battle of Shobdon, defending the vital cross roads before the River Lugg. And it is to this area that the "Red Horde" of Comrade Professor Winter's slowly advanced, seeking to gather support (financial and political) for their Red Revolution....

The battle lines have stablised as all parties seek to recover from the exertions of recent VBCW events. Both Maynard and Winters have, as a matter of irony, received identical orders from their respective HQs - use this temporary lull in order to gather support from the local farmers, and to tax them in order to pay for the continuing Civil War.

Neither High Command has explained to our gallant battlefield commanders how both these tasks can be accomplished simultaneously. Politics!

And thus to our player's starting positions:

Senior Captain Maynard : is situated to the east of the battle area, with a full "WTDW" Platoon of Government forces. His orders are to collect £100 of "back taxes" from every farmer in the area, whether in cash or kind, and give a bloody nose to any Communist forces he might encounter in the process. His forces have no money in their own Treasury, and are running low on food, petrol and ammunition....

Comrade Professor Winters : is situated to the west of the battle area, with a full "WTDW" Platoon of Communists forces. His orders are to collect £100 of "voluntary revolutionary contributions" from every farmer in the area, whether in cash or kind, and give a bloody nose to any Government forces he might encounter in the process. His forces have no money in their own Treasury, and are running low on food, petrol and ammunition....

The Farmers : occupy their farmhouses as randomly distributed across the battle area, each with a full "WTDW" Platoon of Local Defence Volunteers (i.e. their tenants, workers and family). Their task is to avoid paying any money to anyone, if they can get away with it, and at all costs to preserve their own property, and preferably independence. This doesn't just mean their own farmhouse, for their fields are scattered with their animals (horses, cows, pigs, sheep, ducks, rabbits etc...), and so are their neighbours'. Of course, the Farmers have no love at all for their neighbours (too many boundary disputes over the years), and a "VBCW disruption" might be just the time to rustle some of their neighbour's animals. Troops in the field are always hungry! Each farmer has only £50 in his Treasury (hidden under a bed in his Farmhouse), and dreads a visitation from the Government Tax Man/Revolutionary Contributions Gatherer. They need that money to keep their own people fed (and ammunitioned)!

And in the surrounding area (or aether):

The Commercial Traffic : The crossroads of the B4362 and A4110 is a busy junction, choked with "commercial traffic" frantically trying to deliver goods and services in the middle of a Civil War. Vans and trucks race along the roads, seeking to avoid being hi-jacked and robbed of their valuable cargos....if they have any, of course?

Operation Scylla : What is Operation Scylla? Everybody's been talking about it (in hushed tones, of course), but nobody seems to know what it is....A plot to rescue the captured Bishop of Hereford? The use of poison gas? A mechanised attack of some kind? A Communist bombing raid from the newly capture Shobdon Airfield?  Shhhhh....don't mention "Operation Scylla"!

Scenario Rules

1. Animals : the agricultural animals are scattered across the playing area in a random fashion, placed by the Umpires before the start of the Big Game. Animals do not move by themselves. They may be "rustled" by any foot figure coming into base to base contact with them. Once "rustled", such animals stay in base to base to base contact with such foot figure, unless (a). the figure is killed; or (b). the figure is part of a unit that becomes "Jumpy", or (c). the Umpires use their discretion to account for unforeseen circumstances. On any such event, the animal is "released" and moves in a random direction for a distance of 2D6. EM4 direction dice may be used (other brands are available). There is no fixed value ascribed to any particular kind of animal : this is a matter for the players and "market conditions".

2. Taxes (or Voluntary Contributions) : Taxmen have a limited degree of discretion as to the amount of taxes they collect. Taxes (etc) may be paid by agreement in kind. Monetary taxes do not need to be reflected on the table by figures (the cash is simply handed over between players) but animals or "other goods" traded in lieu of taxes must be handed over by use of the "base to base" contact method. HQ "runners" may be very useful for this purpose. A failure to collect Taxes (etc) may result in further shortages of petrol, food or ammunition being experienced by the defaulting player, with serious effects upon their continuing ability to fire and/or move and/or keep their troops spirits up....Of course, payment of too much by way of Taxes (etc) by any of the Farmers may equally result in them suffering identical shortages...It is up to the Umpires, in their complete discretion, to decide at any given time whether any of the contending players have "run out of money", and what the battlefield consequences are for their forces.

3. Commercial Traffic : various trucks and vans are scattered across the roads of the playing area in random fashion, placed by the Umpires before the start of the Big Game. Additional trucks and vans may enter/exit the playing area during the Big Game, all as directed by the "Commercial Traffic Controller". Trucks and vans move according the WTDW rules at the end of each move. It is well known that these trucks and vans are usually stuffed with trade goods (and perhaps even money!) and are "ripe for the picking". But be warned: on some occasions, anticipated treasure may turn to real terror! Trucks and vans may be stopped by any reasonable method (foot troops pointing rifles and shouting "Stand and Deliver"!, Armoured Cars parked across the road, cavalry surrounding the van, etc. etc.). The Commercial Traffic Controller (an Umpire) will decide when a truck or van is sufficiently stopped by a player's forces, and the result of the hold-up....all by using the unique Umpires Random Predictor Mechanism (TM).

4. "Shoddy Tanks" : those who have completed their "Shoddy Tank Conversion" as part of the 2019 Armoured Modelling Challenge (see blogposts passim) can field one such "Shoddy Tank" in support of their forces as a special umpire bonus. Congratulations! Unfortunately, these tanks are appropriately named : they have reduced armour (treat as armoured car for firing at purposes) and are prone to misfires and breaking down. Before moving or firing, a "Shoddy Tank" must throw a D6 : 1 - 3 failure, 4 - 6 success. The Umpires never said they'd be game changers! 

5. Non-Aligned Forces After the disaster of the Second Battle of Shobdon, the Automobile Association have resolved never again to "act as a courier" for any of the contending factions, but instead to return to their independent role as "Guardians of the Road". They have their Armoured Car, a section of AA Patrolmen (with LMG) and a "Shoddy Tank" (see blogposts passim) in the area of Mortimers' Cross, and are supported by the Mortimer's Cross Police Detachment (2 sections of policemen with LMG, and a Police Anti-Tank Gun. (These police may be "moving about the area" in vans). In addition, as Luctonians RFC playing fields are just opposite the Mortimer's Cross memorial pedestal, there will be a group of rifle armed Rugby Players (all the forwards, a scrum half and stand off) with a unique VBCW weapon - an exploding Rugby Ball! The ExRB (as kicked by the stand off) operates just as a VBCW mortar, but with one key change: instead of the ball exploding where it lands initially, it bounces in a random direction (well, it is an oddly shaped ball - use that EM4 direction die), performs another mortar move, and only explodes on "second landing". Use the mortar template as usual. The same rules apply for these "Non-Aligned Forces" as for the Peace Protestors in the preceding Second Battle of Shobdon, i.e. you can use your Action Cards at your discretion, not to move/fire a section or playing piece of your own force, but to move/fire a section or other playing piece of the Non-Aligned Forces. As with any other section/playing piece, Non Aligned Forces can only move/fire once per move.

6. Diplomacy : in the usual way, there are no fixed rules for diplomacy. Farmers may find it helpful to ally with/betray either the Government or the Red Revolutionaries (or indeed with each other - who needs these taxmen, anyway?), dependent upon their interests at the time. Perhaps a farmer can obtain a remission on their tax (etc.) bills by a useful alliance...or can get away without paying anything by another?

7. Rules : our usual (latest Mort amended) rules, save that, as per the last couple of games, we are playing "one phase" moves rather than "two phase" moves, and cavalry do not have to take a morale test before "charging home". Any other modifications will be notified before the start of play (or approved by the Umpires during the course of play).

8. Chance Cards. Alan's Chance Cards are intended to be in operation for this "Big Game".

9. Operation Scylla : Shhh! Don't mention Operation Scylla! If Operation Scylla occurs at all (and that's rather difficult to predict, as no-one know what it is) then the Umpires will re-issue amended Scenario Rules.

What is Operation Scylla? As ever, the answer to this vital question (and many more) can only be discovered by participation in the Hereford VBCW Autumn 2019 BIG GAME ("Mortimer's Cross Redux aka Operation Scylla")..........

THE WAR ILLUSTRATED No.15 - SECOND BATTLE OF SHOBDON

17. FINIS

Standing in the grounds of Shobdon Court, Lieutenant Lucy tugged at the braided cuff of his commander, Senior Captain Maynard. 

"Come away, sir. There's nothing more you can do here" he muttered sympathetically. "If we make a move now, we can evade the Anglicans at Shobdon Instructional Centre and still make our own lines. It appears that Sir James is making his own way back, albeit somewhat unsteadily after all that time in "The Red Lion". And Queeg will already be landing at Hereford Racecourse."

Maynard cursed, reluctantly giving the necessary orders. But he had one last duty : his own Regional HQ. If he could not occupy Shobdon Court, he'd be damned if that jumped up grocer, Hodges, had both the Bateman mansion and the title....

"Explosives ready?" Maynard enquired of his Chief Engineer.

"At your command, sir". A nod from Maynard and the Chief Engineer pressed the plunger.... 

The final destruction of Shobdon Court. Readers of this blog will recollect that while Shobdon Church and the
Stables and Servants Quarters to this great Herefordshire Country House remain to be seen by the casual tourist,
Shobdon Court itself has utterly vanished. It is only now that the true VBCW story of its destruction can be told...
It is just possible that the Chief Engineer overestimated the amount of explosive necessary for the job....
"Where to, sir?" Lucy had commandeered the Automobile Association command car. Maynard studied his maps carefully. "Mmm....Mortimer's Cross, Lucy. That's where we'll hold'em. All of them: the damned Reds, those sanctimonious Anglicans, traitor Hodges and his toadies - let 'em all come. We'll hold them at Mortimer's Cross!"

We usually finish a Big Game Report with a grinning photograph of the winner of the Umpires' Award, on this
occasion the fabulously valuable "Golden Grenade of Shobdon" (with real sound effects!). Unfortunately, due to
the demise of the 28mm Anglican staff photographer, no such photograph of this time's winner - Alan (Senior
Captain Maynard) actually exists. To compensate (although it may be that Maynard would not regard it as
any compensation at all) we have a photograph of Mr Hodges' (JP's) standard bearer (and Nan) celebrating his
elevation to the aristocracy (by force of arms, at least). On to Mortimer's Cross and the Autumn 2019 Big Game!
(Note heroic LDV cyclist pedalling into the picture...perhaps an early (and very VBCW)
example of "photo-bombing"?)


WITH MANY THANKS TO ALL WHO CONTRIBUTED PHOTOGRAPHS AND TEXT
TO ALLOW THIS HISTORICAL RECORD TO BE WRITTEN AND ILLUSTRATED

THE WAR ILLUSTRATED No.14 - SECOND BATTLE OF SHOBDON

16. SAUVE QUI PEUT!

The situation was now desperate for Senior Captain Maynard. Having finally concluded an alliance with Young
Mr Grace, he urged him onward to the "West Table" in a final attempt to clear the vital houses overlooking
the Shobdon Airfield road of  "Red Guard".
But it was too little, too late. Even a spontaneous Mommet rebellion could not winkle the Reds out
of the houses, and the Government's last counter-attack failed.
The BUF "Big Gun" still boomed defiance from the grounds of Shobdon Court. But with the Instructional Centre
captured, Sir James Barleycorn not able to respond to calls for reinforcement (it appears the Red Lion only had
a payphone, and Sir James was curiously short of pennies at the vital moment) and the critical Shobdon Court -
Shobdon Airfield road interdicted by both Mr Jones and the Red Guard, Staff Captain Maynard was all out of options.
Commander Queeg now took matters into his own hands. Having defended the airfield against all the odds but with
an inevitable end drawing near, it was time for him to load his loyal Government sailors into the transport planes
and make for the airfield at Hereford Racecourse....

Red Sailors overrun the Airfield as the last of Commander Queeg's defenders fly out. On the "East Table",
after a little to-ing and fro-ing as Sir James Barleycorn MC skirmished around the occupied Instructional
Centre, he too retreated towards Hereford, thankful that he had at least been able to retain his
"VIP Prisoners".

THE WAR ILLUSTRATED No.13 - SECOND BATTLE OF SHOBDON

15. DEATH OF A PHOTOGRAPHER - EAST!

To the east of Shobdon Village, the Ludlow Expeditionary Force (LEF) advance towards the Shobdon
Instructional Centre. These newly raised Jojoban Trillaleurs are commanded by the Rev. Jones,
Chaplain to the Bishops. The Bishop of Lichfield has already departed in support of Mr Hodges
on the centre table.
Major Sir James Barleycorn MC's counter attack goes in. His truck mounted "roadside" bombs try to take out
an Anglican tank and the Jojoban Trillaleurs. A section of Shobdon policemen guard the Instructional Centre.
The mass of armour that is the Ludlow Experimental Armoured Force is at the top of the photograph, to
the left of the infamous Ludlow Light Lancers, already gearing up for another charge.
At this point, we have to announce the sad demise of the 28mm staff photographer recording the action to the east of Shobdon : it may be that he fell to a BUF sniper, but it is equally possible that he got too close to a truck mounted "roadside" bomb as it exploded.

And thus, to the detriment of the historical record, there are no photographs of the first successful cavalry charge ever carried out by the Ludlow Light Lancers! (There have been plenty of unsuccessful attempts). The BUF "not-roadside bomb" strategem having largely failed and the BUF Armoured Car having been incapacitated (thus placed in the large hole, above) the Lancers girded their capacious loins and charged straight through the gates of the Shobdon Instructional Centre, massacring the Ludlow police guards and capturing the Camp Commandant! 

Chaplain Jones swiftly followed up with his infantry sections, occupying the guard houses and living quarters of the Instructional Centre. Liberation for the VIP Prisoners was now at hand!

But where were those VIP prisoners? And where, for that matter, was the bulk of Major Sir James Barleycorn MC's forces? Intelligence had disclosed many more than the trucks, the armoured car, and a section or two of police...

It was at this point that the Major disclosed that "they'd all gone down the pub" in Little Shobdon...Christian protests that "come on, that's not really within the scenario rules, is it?" were met with a disdainful glare and a flourish of Sir James' Military Cross. "I didn't get this by sticking to scenario rules, now did I?".....[note1]

[1] Military commentators have since sought to analyse Sir James' strategy. The concealed move to "The Red Lion" in Little Shobdon was praised for "keeping his force intact in the face of overwhelming numbers", but equally criticised on the basis that, by moving east, he had disabled himself from coming to the aid of Senior Captain Maynard on the "central table", perhaps by putting pressure on the recalcitrant Mr Jones ("We be Shobdon"!). Transcripts of coded messages from the Senior Captain to the Major have proved impossible to decode, consisting as they do of four letter dots and dashes on a repeating basis, and are recorded simply as the "unbreakable Profanity Code". It may be, of course, that the always complicated internal politics of  HMG within the County (the nascent split between "Royalist" and "BUF" being the most obvious example) meant that Sir James never had any intention of supporting the Senior Captain, but was looking to his own interests and long term reputation....

Wednesday 2 October 2019

THE WAR ILLUSTRATED No.12 - SECOND BATTLE OF SHOBDON

14. MR HODGES' AUDACIOUS GAMBIT


A view of the "centre table" - from Mr Hodges' Pillbox. Shobdon Village is off to the left, where the AA Column is
battling on (and mostly burning). The Government being distracted (and mostly distraught), now is the time for
Mr Hodges' Gambit! He sends his infantry forward, his cavalry into a charge, and launches his Armoured Cars
towards Shobdon Junction, with its all important Bateman Coat of Arms.
Charge! For the true 4th Baron Bateman!
Mr Hodges' "Lash Up Mk1" Armoured Car swerves through Shobdon Junction at speed, only to fall
victim to a BUF A/T Rifle. Heavy shellfire descends on the advancing cavalry....
..as the BUF "Big Gun" in the park of Shobdon Court deals out death. Mr Hodges' cavalry are effectively
obliterated. Lt. Lucy's forces are ordered forward to stabilise the Government's position...
..and set up a firing line along the driveway to Shobdon Court. Just as Mr Hodges' forces look finished, Anglican
reinforcements begin to arrive from the East Table (the Bishop of Lichfield's brown trucks and prime movers
are visible in this shot). Mr Hodges must re-gather his forces for another attempt...
Bugger This! A lone LDV cyclist can't wait for another assault. He pedals furiously forward to the Bateman Coat of
Arms, dodging shot and shell. A swerving turn as he gathers the standard from the Junction roadway, and then a
furious pedal back, weaving from side to side as he evades everything thrown at him. A true Shobdon hero!
[and the Umpires shuffle awkwardly. They had meant the Coat of Arms to be a fixed point to be battled
over, but had forgotten to write in a scenario rule that it could not be moved. Much blather about
apologies, lessons learned, learning points, etc. etc. - but the Bateman Coat of Arms is now with
Mr Hodges - can he hang on to it until the end of the battle?]

THE WAR ILLUSTRATED NO.11 - SECOND BATTLE OF SHOBDON

13. AUTOMOBILE ASSOCIATION HO!


A revving of engines....and the AA are go! Commander Camshaft vaults into the turret of his Rolls Royce
Armoured Car and closes the hatches. Finally, he has his orders. Having failed to obtain the overt support
of any Shobdon LDV (and incurred the outright emnity of Mr Hodges) and seeing the aggressive Communist
advance on the "East Table", Senior Captain Maynard has no option but go get his supply column moving. He
can rely upon the AA's speed of movement - but will this charge be death or glory?
The AA Supply Column turn west out of the driveway of Shobdon Court and into
Shobdon Village. At the rear of the column can be seen some HMG Armoured
Cars in support. At the front of the column,  to the left, Young Mr Grace's van and
Armoured Car. Are they going to intervene?
A reverse shot as the column heads through the village. All is quiet for now, and Young
Mr Grace is finally making supportive noises...will he throw in his lot with HMG
and become the 4th Baron Bateman? Mr Jones' Cricketers look on sullenly, but silently...
The Jones LDV Cricket Section peer over a hedge at the AA Column.
Do they have orders to shoot - or stay their hand?
A panoramic view as the AA column passes Young Mr Grace's armoured car and Shobdon churchyard.
It appears that Young Mr Grace has finally allied himself with HMG... 
Kaboom! Frenzied shouts of "We be Shobdon!", and Mr Jones' men open fire on the AA column
The developing disaster for Senior Captain Maynard. One of the AA trucks burns as Mr Jones'
men pile on the pressure. A Very Important Crate lies on the ground, abandoned.
Mr Jones' men are not yet finished. The Church provides an excellent ambush point..."We be Shobdon!"
And Kaboom ! again. A second AA truck goes up in smoke. Senior Captain Maynard's plan
to "bull through" to Shobdon Airfield with the Very Important Crates is destroyed, and
with it any hope of  Government victory at the Second Battle of Shobdon.

Tuesday 1 October 2019

THE WAR ILLUSTRATED No.10 - SECOND BATTLE OF SHOBDON

12. GROUND ACTIVITY - WEST

Aerial Threat despatched, the Reds advance on Shobdon Airfield continues. Comrade Professor
Winters' troops execute a classic envelopment advance....
...as Commander Queeg's troops ready their defence. (One could say "circle the wagons"
but they didn't have enough wagons for that - just an RAF lorry and BUF Armoured Car)
But the most important development is across the road from the Airfield......
...where Comrade Gollumroo's flanking mounted infantry reach their objectives and swiftly garrison
the houses. Now they overlook the road leading from Shobdon Court to Shobdon Airfield....
Comrade Professor Winters is so excited that he changes his uniform.
(Ed Note - perhaps that should read : "...had to change his uniform"?)

THE WAR ILLUSTRATED No.9 - SECOND BATTLE OF SHOBDON

11. AERIAL ACTIVITY - WEST !

West of Shobdon Village, Commander Queeg fights on against the Communist Hordes, desperate to keep
Shobdon Airfield open as long as possible. The first of his Transport Planes lines up to make a
landing at the Airfield, ready to receive those Very Important Crates...

...and are soon joined by two others. Queeg telephones Senior Captain Maynard : "I've done my bit already. Get those Very Important Crates to me, and I can get them away to Hereford and save them - and possibly you!". 
It's all happening around Shobdon Airfield now. Queeg sends up a newly arrived BUF Henschel HS123 Fighter Bomber on a search and destroy mission. With so many Communists heading towards the Airfield, there is
little need to "Search". The pilot reaches for his bomb lever - "Destroy"!

Bombs away! The casualties below are slight, but the return fire is very heavy.....
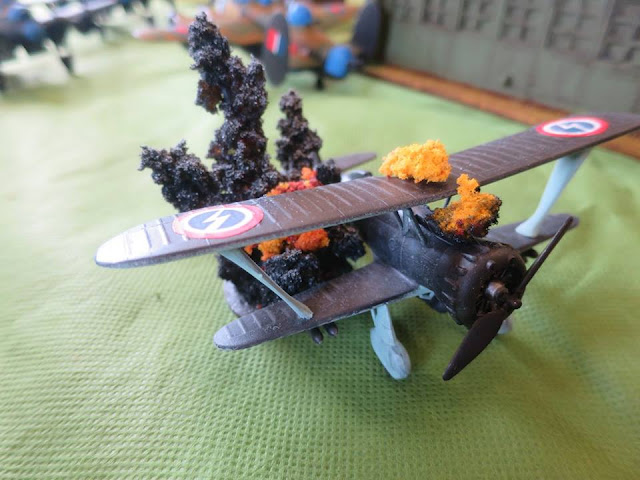
....and the Henschel crashes to earth on the airfield perimeter, shot down!
Comrade Professor Winters' Propaganda Bureau like this photograph. It will be endlessly reproduced
in "The Presteigne Red Banner" - Death to all Fascists! Commander Queeg's stalwart (veteran/experienced/
heroic) defenders groan, and again turn to face the enemy....

THE WAR ILLUSTRATED NO.8 - SECOND BATTLE OF SHOBDON

10. BATTLE IS JOINED - CENTRE!

To the east of the "Central Table", the LDV forces of Mr Hodges advance with rather more
determination. Two armoured cars (one a "Lash Up Mk.1") advance down the road to Shobdon Village,
flanked by infantry sections. Mr Hodges has the assurance of Anglican reinforcements....
Boom! With a last despairing cry of "Pacifism Forever!", Miss Florence Cholmondley-Warner immolates
 herself in the cause of peace, right in front of Mr Hodges' Cavalry Section. The check proves temporary..
Just as Scamp, her beloved pooch (Arf! Arf! Woof!) explodes himself in front of Mr Hodges' advancing armoured cars.
The armoured cars are slightly damaged, but continue on. Mr Hodges has cause to detect the hand of
Senior Captain Maynard behind this high explosive activity...

THE WAR ILLUSTRATED No.7 - SECOND BATTLE OF SHOBDON

9. BATTLE IS JOINED - CENTRE?

While the forces East and West of Shobdon exchange first fusillades, the action around Shobdon Court (centre table)
is strangely muted. Here, Young Mr Grace deploys his forces quietly in "all round defence", assuring Senior
Captain Maynard of his honourable intentions but refusing an open alliance. To the rear of Young Mr Grace's
command just be seen the forces of newly commissioned Lieutenant Lucy, No.2 to Staff Captain Maynard (blue van).
In the same area lurks Miss Primula Cholmondley-Warner (blue skirt and "big red tomato")
Equally quietly, Mr Jones occupies Shobdon Village. Here, his cricket team warily advance.
Of course, he has the same entirely honourable intentions with regard to HMG, but no,
he won't enter into an alliance either. Senior Captain Maynard wonders why....
When will the order be given? The AA Truck Column still waits in the grounds of Shobdon Court.
Captain Camshaft (waving pistol) makes anxious enquiries of his ADC, Patrolman Nolan.
BUF Support Vehicles can be seen in the rear of this photo.

THE WAR ILLUSTRATED NO.6 - SECOND BATTLE OF SHOBDON

9. BATTLE IS JOINED - WEST!

Blue on Blue Action - Commander Queeg's Naval Section form a firing line at the edge of Shobdon Airfield,
preparing to meet the charge of Comrade Professor Winter's Red Sailors.
Further west on the same "table", another Naval Section loyal to the Government comes under fire.
Behind the hedge lines, an Anti Tank Gun sets up to take on the formidable (but unarmed) Armoured
Hedge Clearing Vehicle, while a BUF Armoured Car provides support.
A cunning plan. While Commander Queeg's forces are pinned back on the airfield perimeter, Cormrade Professor
Winters launches a flanking attack of  Red Mounted Infantry across table, aiming to occupy the buildings
overlooking the roadway from Shobdon Court to Shobdon Airfield. Comrade Gollumroo urges his forces
forward - speed is vital, comrades!

THE WAR ILLUSTRATED No.5 : SECOND BATTLE OF SHOBDON


8. BATTLE IS JOINED - EAST !

Shobdon Instructional Centre under Attack! The Forces of the Rev. Jones, Chaplain to the Bishops (including
an Artillery piece, centre, and the newly recruited Jojoban Fusiliers, right) advance in company with the
Ludlow Experimenal Armoured Force (top). The Ludlow Light Lancers, regularly deployed and equally regularly
utterly destroyed, charge towards the entrance to Shobdon Instructional Centre. Now part of Sir James' Government
strategy becomes clear : to mount his stock of Roadside Bombs in BUF trucks and drive them full tilt at
the advancing Anglicans, exploding them at the best opportunity! Christian suggestions that
"such isn't it in the rules, now really, is it?" are met with an aristocratic raised eyebrow.